You need an author website — and not just a pretty one. You need a site that converts visitors into readers, subscribers, and book buyers.
In this guide, you’ll learn:
- How to set up your author website from scratch (even with zero tech skills)
- Which pages every author website needs and what to put on them
- How to build an email list that actually grows
- The SEO basics that help readers find you through Google
Here’s the step-by-step process for building a website that works as hard as you do.
Why Every Author Needs a Website
Your author website is the only piece of online real estate you truly own. Social media platforms change algorithms, bookstores control your product page, and publishers manage your catalog listing. Your website is yours.
More than 65% of authors who actively sell books rank their personal website as their most important platform — above social media and Amazon. That number keeps climbing.
An author website does three things no other platform can:
- Builds your email list — the single highest-ROI marketing channel for authors
- Sells books directly — no middleman, higher margins, reader data you keep
- Establishes credibility — agents, publishers, and media check your site before reaching out
Think of your website as a conversion engine, not a digital business card. Every page should guide visitors toward one action: joining your email list or buying your book.
Step 1: Choose and Buy Your Domain Name
Your domain name is your address on the internet. Get this right first.
Best practice: Use your author name as your domain. If you write as Jane Smith, buy janesmith.com. If your name is taken, try janesmithauthor.com or janesmithbooks.com.
Here’s what to keep in mind:
- Use .com — readers remember it, and it looks more professional than .net or .io
- Avoid hyphens and numbers —
jane-smith-123.comlooks spammy and is hard to remember - Buy it now, even if you’re not published yet — domains cost $10-15/year through registrars like Namecheap, Google Domains, or Cloudflare
- Grab your pen name domain too — if you write under a pen name, secure that domain before someone else does
For fiction authors using pen names: Buy domains for each pen name. A romance reader looking for “Faye Lennox” shouldn’t land on a horror author’s page.
Step 2: Pick a Website Builder
You don’t need to code. Modern website builders handle the technical work so you can focus on your content.
Here are the best options for authors in 2026:
WordPress (Self-Hosted)
Best for: Authors who want full control, SEO power, and long-term scalability.
WordPress powers over 40% of all websites on the internet. It offers thousands of themes, plugins for every feature imaginable, and the strongest SEO capabilities of any platform.
Cost: $3-10/month for hosting (through Bluehost, SiteGround, or similar) plus your domain.
Downside: Steeper learning curve than drag-and-drop builders. You’ll spend a few hours setting it up.
Squarespace
Best for: Authors who want beautiful design with minimal effort.
Squarespace templates are polished and professional out of the box. The drag-and-drop editor makes it easy to build pages without touching code.
Cost: $16-33/month depending on your plan.
Downside: Less flexible than WordPress for advanced customization and SEO.
Wix
Best for: Authors who want the easiest possible setup.
Wix’s AI-assisted builder can generate a basic site from a few prompts. The editor is intuitive, and you can have a functional site in under an hour.
Cost: $17-32/month for premium plans.
Downside: Harder to migrate away from Wix if you outgrow it.
Carrd
Best for: Authors who need a simple, single-page site fast.
If you just need a landing page with your bio, book links, and an email signup, Carrd does it for $19/year. Seriously.
Cost: $19/year for Pro.
Downside: Limited to single-page sites. No blog functionality.
My recommendation: Start with WordPress if you’re serious about building a long-term author career. The SEO advantages alone are worth the slightly steeper setup. If you want simplicity and don’t care about blogging, Squarespace is the next best choice.
Step 3: Gather Your Assets Before You Build
Before you touch your website builder, collect everything you’ll need. This saves you from the frustrating stop-and-start of building while hunting for files.
Your author photo checklist:
- One professional headshot (at least 800x800 pixels)
- One casual/lifestyle photo for your About page
- Photos should be well-lit, high-resolution, and recent
Your book assets:
- High-resolution book cover images (front cover, 3D mockup if you have one)
- Book descriptions (the same ones from your Amazon listing work great)
- Purchase links for every retailer where your book is sold
- ISBNs and any awards or endorsements
Your written content:
- Author bio (two versions — a short 2-3 sentence one and a longer About page version)
- A compelling tagline or one-liner about what you write
- Blurbs, reviews, or testimonials from readers
Need help writing your author bio? We’ve got a full guide with examples that actually work.
Step 4: Design Your Homepage
Your homepage is the most important page on your site. Most visitors decide within 3-5 seconds whether to stay or leave.
The “Reader Journey” framework organizes your homepage around what visitors actually need:
Above the Fold (What They See First)
- Headline: Your name + what you write. Example: “Jane Smith — Thriller Novels That Keep You Up All Night”
- Hero image: Your book cover or a professional author photo
- One clear call-to-action: Either “Get My Free Book” (email signup) or “Read My Latest Novel” (book link)
Keep it clean. One message, one action. Don’t overwhelm visitors with every book, every social link, and your life story all at once.
Below the Fold
- Featured book(s) — cover image, short description, buy button
- Social proof — press mentions, awards, reader testimonials, bestseller badges
- Email signup — a second opportunity to join your list with a compelling lead magnet offer
- Latest blog posts — if you blog, show 2-3 recent posts
Common homepage mistakes:
- Autoplay music or video (readers will close the tab immediately)
- A giant wall of text about your childhood dream of becoming a writer
- No clear call-to-action (visitors don’t know what to do next)
- Stock photos instead of your actual book covers
Step 5: Build Your Essential Pages
Every author website needs these pages. Skip any one of them and you’re leaving opportunities on the table.
Books Page
This is your catalog. For each book, include:
- Cover image (high resolution)
- Title and subtitle
- A compelling 2-3 sentence description (not a full synopsis — a hook)
- Buy buttons linking to Amazon, Barnes & Noble, your direct store, and any other retailers
- Series order if applicable
Pro tip: Put your newest or best-selling book first. Don’t bury your strongest asset at the bottom of a chronological list.
If you sell books directly from your website, you keep 90-95% of the revenue instead of 30-70% through retailers.
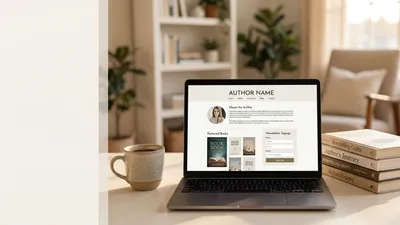
About Page
Your About page is typically the second most-visited page on an author website. Readers want to know the person behind the books.
What to include:
- Your author story — why you write, what drives you (keep it to 2-3 paragraphs)
- A professional photo (different from your homepage photo for variety)
- Your credentials, awards, or relevant background
- A personal detail or two that makes you human (your dog’s name, your coffee obsession, your hometown)
What NOT to include:
- Your entire life chronology from birth to present
- A list of every conference you’ve attended
- Anything you wouldn’t want a stranger to know
Need inspiration? Check out these about the author examples from successful authors.
Contact Page
Keep it simple. A contact form is better than listing your raw email address (which invites spam). Include:
- A contact form with name, email, and message fields
- A note about response times (“I respond to reader emails within 48 hours”)
- Your literary agent’s contact info for business inquiries (if applicable)
- Social media links
Blog Page
A blog isn’t mandatory, but it’s the single best way to drive organic search traffic to your website. Authors who blog consistently see 3-5x more website traffic than those who don’t.
What to blog about:
- Behind-the-scenes of your writing process
- Writing tips related to your genre
- Book recommendations in your niche
- Updates on upcoming releases
You don’t need to post weekly. One quality post per month beats four rushed ones.
Media Kit Page
If you want press coverage, speaking invitations, or podcast appearances, a media kit page makes journalists’ jobs easier. Include:
- A downloadable high-resolution author photo
- A short bio (150 words) and long bio (300 words) — ready to copy and paste
- Your book covers as downloadable images
- A list of topics you can speak about
- Links to past interviews or features
- Contact information for media inquiries
Step 6: Set Up Your Email List
Your email list is your most valuable asset as an author. Social media reach is unpredictable — email marketing delivers your message directly to readers who asked to hear from you.
The average website email signup rate is 1.95%. Top-performing author websites hit 5-8% by offering a compelling lead magnet.
Choose an Email Service Provider
- MailerLite — Free up to 1,000 subscribers. Best for most authors starting out.
- ConvertKit — Built for creators. Excellent automation features. Free up to 1,000 subscribers.
- Mailchimp — The most well-known option. Free up to 500 subscribers.
Create a Lead Magnet
A lead magnet is what you offer in exchange for an email address. “Sign up for my newsletter” is not compelling. These are:
- A free short story or novella set in your series world
- The first 3 chapters of your latest book
- A writing resource (checklist, template, or guide) if you write nonfiction
- Bonus epilogue or deleted scenes from a published book
- A printable reading tracker or book journal template
Place Signup Forms Strategically
Don’t hide your signup form on a separate page. Embed it in:
- Your homepage (above the fold AND below the fold)
- The end of every blog post
- Your About page
- A dedicated landing page you can link from social media
- A popup that triggers after 30 seconds or on exit intent (use sparingly — one popup, not five)
Set Up a Welcome Sequence
When someone joins your list, don’t leave them in silence. Send 3-5 automated emails over the first two weeks:
- Welcome + deliver the lead magnet (immediate)
- Your story — why you write, what readers can expect (day 2)
- Your best book recommendation — your most popular title with a buy link (day 5)
- Social proof — share a reader testimonial or review (day 8)
- Invitation to connect — ask them to reply with their favorite book in your genre (day 12)
Step 7: Optimize for Search Engines (SEO)
SEO helps readers find your website through Google searches. You don’t need to be an expert — a few basics go a long way.
On-Page SEO Essentials
- Title tags: Every page needs a unique title tag under 60 characters. Your homepage might be “Jane Smith — Bestselling Thriller Author”
- Meta descriptions: Write a 150-160 character summary for each page. This appears in Google search results.
- Header tags: Use H1 for your page title, H2 for major sections, H3 for subsections. Don’t skip levels.
- Image alt text: Describe every image for accessibility and SEO. “Jane Smith author headshot” not “IMG_4532”
- Internal links: Link between your own pages. Your Books page should link to individual book pages. Blog posts should link to related posts.
Content That Ranks
If you want your author website to show up in Google, create content around terms your readers actually search for.
Examples of author-relevant searches:
- “[Your genre] book recommendations”
- “Books like [popular title in your genre]”
- “[Writing topic] tips” (if you write about writing)
- “Best [genre] series 2026”
Using AI tools like Chapter can help you outline and draft blog content quickly. Chapter’s AI writing assistant lets you generate first drafts that you can then edit and polish in your own voice — saving hours on content creation while keeping the quality high.
Technical SEO
- Make sure your site loads fast — compress images, use a caching plugin (if on WordPress), and choose quality hosting
- Mobile-friendly design — over 60% of web traffic is mobile. Test your site on your phone.
- SSL certificate — your site should use HTTPS. Most hosting providers include this free.
- Submit your sitemap to Google Search Console — this helps Google find and index your pages
Step 8: Build Your Author Platform Beyond Your Website
Your website is your hub, but it works best as part of a larger author platform.
Connect your website to:
- Social media profiles — link from your website and link back from your social bios
- Amazon Author Central — claim your author page and link to your website
- Goodreads — connect your author profile
- BookBub — set up your author profile for reader discovery
Keep your website current:
- Update your Books page when you publish something new
- Refresh your About page photo every 2-3 years
- Post to your blog at least monthly if you have one
- Check all external links quarterly (broken links hurt SEO and credibility)
Your author website is a living thing. The authors who get the most value from theirs treat it as an ongoing project, not a one-time setup.
How Much Does an Author Website Cost?
The cost depends on your approach:
| Approach | Monthly Cost | Best For |
|---|---|---|
| Carrd (single page) | ~$2/month | Authors who need a quick landing page |
| WordPress + hosting | $3-10/month | Authors who want full control and SEO |
| Squarespace | $16-33/month | Authors who want polished design easily |
| Wix | $17-32/month | Authors who want the easiest setup |
| Professional designer | $500-5,000 one-time | Authors with budget who want custom design |
The hidden costs most guides don’t mention:
- Domain renewal: $10-15/year
- Premium theme: $30-80 one-time (WordPress)
- Email service: Free to start, $15-50/month as your list grows
- Professional photos: $150-400 for a session
Most authors can build a professional website for under $200 in the first year.
Common Author Website Mistakes to Avoid
- No email signup form — the biggest missed opportunity. Every page should have a path to your list.
- Outdated content — a “Coming 2023” banner in 2026 screams abandonment. Keep dates current.
- Too many fonts and colors — stick to 2 fonts and 3-4 colors. Clean design builds trust.
- No mobile optimization — if your site looks broken on a phone, you’re losing over half your visitors.
- Buried book links — your books should be one click from any page. Don’t make readers hunt.
Do Unpublished Authors Need a Website?
Yes — but keep it simple. If you haven’t published yet, your website serves a different purpose. It builds your author identity early and gives you a place to grow your email list before launch.
What an unpublished author’s website needs:
- A homepage with your name and what you’re working on
- An About page with your story and writing journey
- An email signup with a lead magnet (a free short story, writing tips, etc.)
- A blog if you enjoy writing about your genre or craft
You don’t need a Books page yet. Add it when you have something to sell. The point is to start building your audience now so you have readers waiting when your book launches.
Can AI Help You Build an Author Website?
AI tools in 2026 can dramatically speed up the website-building process. Here’s where they genuinely help:
- Writing your About page and book descriptions — AI can draft these quickly, then you refine in your voice
- Generating blog content — tools like Chapter help you outline, draft, and polish blog posts that drive traffic to your site
- Creating a content calendar — AI can analyze your genre’s trending topics and suggest what to write about
- Optimizing for SEO — AI tools can suggest title tags, meta descriptions, and keywords
Where AI doesn’t help: choosing your brand colors, selecting your author photo, or making strategic decisions about your career direction. Those are still human territory.
FAQ
What Is an Author Website?
An author website is a personal website where you showcase your books, share your story, and connect with readers. It serves as your central online hub — the one platform you fully control. Unlike social media profiles, your author website lets you build an email list, sell books directly, and establish credibility with agents and publishers.
How Many Pages Does an Author Website Need?
An author website needs at minimum five pages: a homepage, About page, Books page, Contact page, and an email signup landing page. Most successful author websites also include a blog for SEO traffic, a media kit for press inquiries, and individual pages for each book or series. Start with the essentials and add pages as your career grows.
Should I Use My Real Name or Pen Name for My Domain?
Use whichever name appears on your book covers as your domain name. If you write under a pen name, buy that domain. If you write under multiple pen names in different genres, consider separate websites for each to avoid confusing readers. Always buy the .com version first.
How Often Should I Update My Author Website?
Update your author website at minimum whenever you publish a new book, and ideally monthly with fresh blog content. Check for broken links and outdated information quarterly. Refresh your author photo every 2-3 years. Stale websites signal to both readers and search engines that you’re inactive.
Is It Worth Paying for a Professional Author Website Design?
A professional design is worth it if you have the budget and want a custom look, but it’s not necessary to start. Modern website builders like WordPress and Squarespace offer professional-quality templates for a fraction of the cost. Invest in professional design once your author career is generating consistent revenue — typically after your second or third book.