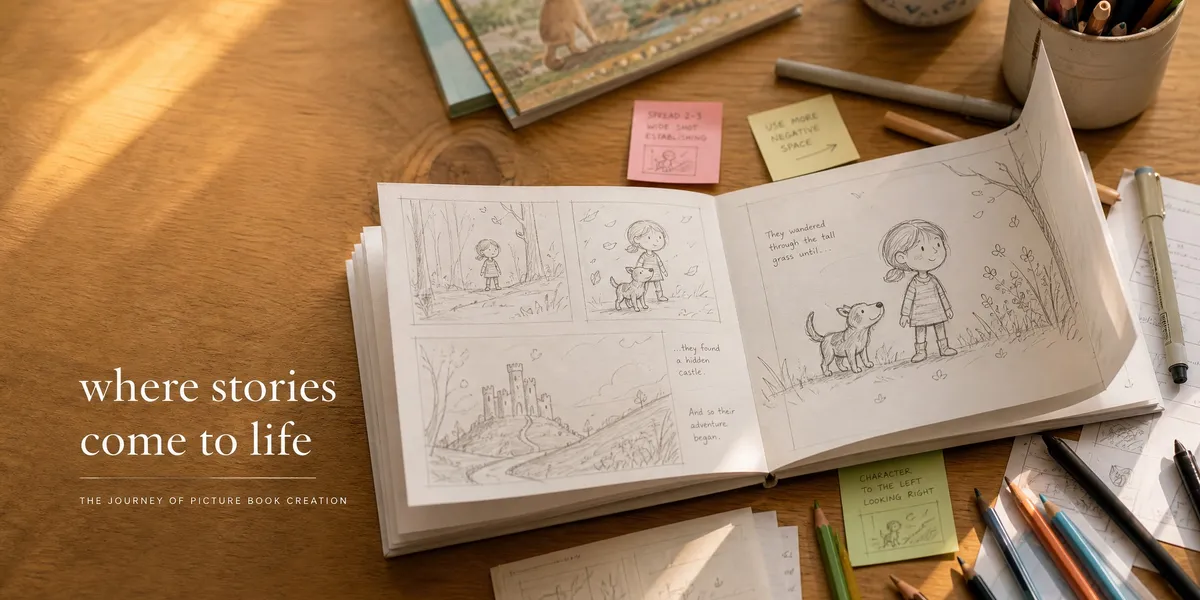
You can write a picture book dummy by folding 8 sheets of paper in half to create a 32-page miniature book, then mapping your story across those pages with rough sketches and text placement — no finished art required.
In this guide, you’ll learn:
- How to build a physical picture book dummy from scratch
- Where your story actually starts (hint: not page 1)
- How to pace text and illustrations across 14 usable spreads
- What agents and editors expect when you submit a dummy
Here’s how to make one that works.
What Is a Picture Book Dummy?
A picture book dummy is a rough, physical mock-up of your picture book that shows how your story flows across pages, where text sits relative to illustrations, and how page turns create rhythm and surprise. It’s the bridge between your manuscript and a finished book.
Think of it as a prototype. Publishers, agents, and art directors use dummies to evaluate whether a picture book concept works as a book — not just as a story. The Society of Children’s Book Writers and Illustrators (SCBWI) considers dummy creation an essential skill for author-illustrators, and many picture book conferences require a dummy for portfolio reviews.
You don’t need to be an illustrator to make one. Writer-only dummies use stick figures, written descriptions, or simple shapes to indicate what happens visually on each page. The point is pacing and story architecture, not polished art.
Why You Need a Dummy Before You Submit
Skipping the dummy stage is the most common mistake new picture book creators make. Here’s why it matters.
Page turns are storytelling tools. A picture book isn’t prose that happens to have illustrations. Every page turn is a beat — a moment of anticipation, surprise, or emotional shift. You can’t feel those beats in a manuscript document. You need to hold them in your hands.
Text-to-art balance becomes visible. When you see your words on a physical page, you’ll immediately notice where you’ve written too much for a spread or too little for a page turn to land. Many picture book manuscripts get cut by 30-50% during the dummy stage.
Editors and agents expect them. If you’re an author-illustrator submitting to publishers, a polished dummy is standard. Even if you’re a writer submitting text only, understanding dummy construction helps you write manuscripts that work as actual books.
Gather Your Materials
You need surprisingly little to start. Here’s your supply list:
- 8 sheets of blank printer paper (letter size works fine)
- A pencil (you’ll erase a lot)
- A long-arm stapler or binder clips (to hold pages together)
- Sticky notes (for moving text around)
- Colored pencils or markers (optional, for rough color blocking)
That’s it. Professional illustrators sometimes use Bristol board or marker paper for refined dummies, but your first dummy should be quick and disposable. You’re going to make several versions before you land on the right pacing.
If you prefer working digitally, apps like Procreate, Photoshop, or even Google Slides work. But physical dummies teach you more about page turns and tactile pacing, especially the first time. The SCBWI recommends starting physical before moving to digital.
Understand Picture Book Page Counts
Before you start sketching, you need to understand how picture books are printed. This determines everything about your dummy’s structure.
Picture books come in multiples of 8 pages. Because of how printing presses fold large sheets into signatures, your page count options are 24, 32, 40, or 48. The industry standard is 32 pages.
But you don’t get all 32 for your story. Here’s the typical breakdown:
| Page | Content |
|---|---|
| 1 | Half-title page (book title only) |
| 2 | Blank or illustration |
| 3 | Full title page (title, author, illustrator, publisher) |
| 4 | Copyright and dedication |
| 5-32 | Your story (28 pages = 14 spreads) |
Some books push the story start to page 4 or even page 3 by combining front matter. Others use pages 31-32 for back matter. In practice, you have roughly 13-14 spreads for your actual narrative.
Think in spreads, not pages. When the book is open, you see two pages at once — that’s a spread. Your story beats happen spread by spread. A 32-page book gives you about 14-15 spreads to work with once you account for front and back matter.
Build Your Physical Dummy
Now let’s actually make the thing.
Step 1: Stack and fold. Take 8 sheets of printer paper. Stack them neatly, then fold the entire stack in half. This gives you a 32-page booklet. Staple or clip the spine.
Step 2: Number every page. Open your dummy and number each page from 1 through 32. Don’t skip this step — page numbers are your navigation system and they’ll keep you honest about pacing.
Step 3: Mark your front matter. On pages 1-4, write the front matter content (half-title, title page, copyright/dedication). Your story starts no earlier than page 3 and typically on page 5.
Step 4: Mark your back matter. Pages 31-32 are often reserved for back matter, author bios, or publisher info. Mark those too. Now you can see exactly how much space your story has.
You should be holding a miniature booklet that feels like a real picture book. This physical object is your canvas for the next several steps.
Map Your Story Across the Pages
This is where the real work begins. You’re going to distribute your story across your available spreads.
Start with your manuscript. If you haven’t written your picture book text yet, do that first. Keep it under 500 words for fiction picture books. Read it aloud several times. Identify the natural beats — where does the action shift? Where does emotion build? Where is the climax?
Break your text into spread-sized chunks. Each spread typically holds 1-3 sentences. Write each chunk on a separate sticky note. Now physically place those sticky notes on the spreads of your dummy.
Here’s a pacing framework that works for most picture book stories:
| Spreads | Story Beat |
|---|---|
| 1-2 (pages 5-8) | Introduce character and world |
| 3-4 (pages 9-12) | Establish the problem or desire |
| 5-8 (pages 13-20) | Rising action, attempts, complications |
| 9-10 (pages 21-24) | Climax and turning point |
| 11-13 (pages 25-30) | Resolution and emotional landing |
| 14 (pages 31-32) | Final image or coda |
The page-turn test. For every spread, ask: “What makes the reader want to turn the page?” If the answer is nothing, you either need to restructure that beat or cut it entirely. Great picture books make every page turn feel inevitable.
Add Thumbnail Sketches
With your text mapped to spreads, sketch what you see happening visually on each page. These are called thumbnail sketches, and they don’t need to be good.
Stick figures are fine. Seriously. Your thumbnails need to communicate what’s happening and where on the page it’s happening. A circle with two dots for a face is enough to show character placement.
Show, don’t tell — visually. For every chunk of text, ask: “What is the illustration doing that my words aren’t?” The best picture books have text and images telling two complementary stories. If your text says “Max was scared” and your thumbnail shows a scared-looking kid, you’re duplicating effort. Let the art show the fear while the text shows something else.
Vary your compositions. Don’t put the character in the center of every spread. Alternate between:
- Full-bleed spreads (illustration fills both pages)
- Spot illustrations (smaller images with white space)
- Vignettes (character close-ups for emotional beats)
- Wide establishing shots (for new locations or big moments)
This variety creates visual rhythm. Flip through any successful children’s book and you’ll see this pattern at work.
Place Your Text on the Page
Now refine where your words sit relative to your sketches. Text placement in picture books is a design decision, not an afterthought.
Rules for text placement:
- Keep text in consistent zones. Most picture books place text in the same general area (top, bottom, or side) throughout. This trains the reader’s eye.
- Don’t cover the action. Text should never sit on top of the most important visual element.
- Leave breathing room. Text blocks need margins and white space around them to be readable by adults reading aloud.
- Consider the gutter. The center fold of the book (the gutter) can swallow text and important visual elements. Keep critical content away from the center crease.
A pro technique: Write your text on strips of paper and tape just the ends to your dummy pages. This lets you physically move text blocks around until you find the right placement. It’s much faster than erasing and rewriting.
For writers submitting text-only manuscripts, understanding text placement helps you write lines that suggest where they’ll sit on the page. Your manuscript format can include page-break indicators that show you’ve thought about this.
Refine Your Page Turns
Page turns are the secret weapon of picture books. Every great picture book uses page turns intentionally — to create suspense, deliver punchlines, reveal surprises, or shift emotions.
The golden rule: End each spread on an unresolved moment. The reader should need to turn the page. Common techniques:
- The question turn. Text ends with an unanswered question or uncertain moment. “But what was behind the door?”
- The action turn. A character is mid-action when the page ends. The resolution waits on the next spread.
- The contradiction turn. Text says one thing, and the turn reveals the opposite visually.
- The quiet turn. After a big moment, a turn into silence lets the emotion land.
Go through your dummy spread by spread. Read the text on each spread, then physically turn the page. Does the turn create energy? If a spread ends at a natural stopping point, that’s a problem. You want the reader to feel pulled forward.
Review and Revise Your Dummy
Your first dummy is a draft. Expect to make 3-5 versions before the pacing feels right.
Read it aloud. Sit down with your dummy and read it as if you’re reading to a child. Time yourself. Most picture books take 3-5 minutes to read aloud. If yours takes longer, you’ve written too much text.
The wordless flip test. Close the dummy, then flip through it looking only at the sketches, ignoring all text. Can you follow the story? If the visual narrative doesn’t make sense on its own, your illustrations aren’t pulling their weight.
Get feedback. Read your dummy to someone — ideally a child in your target age range, but any willing listener works. Watch their eyes. Do they lose interest on certain spreads? Do they try to turn the page before you’re ready? Both reactions tell you something important about pacing.
Common problems you’ll find:
- Front-loaded text. Too many words on early spreads, not enough visual storytelling
- Sagging middle. Spreads 5-8 where nothing escalates
- Rushed ending. Cramming resolution into the last spread instead of letting it breathe
- Dead spreads. Pages where neither text nor image creates forward momentum
Create a Polished Dummy for Submission
Once your rough dummy is solid, you may need a polished version for agents, editors, or SCBWI conferences.
For author-illustrators: Redraw your thumbnails as cleaner, more detailed sketches. You don’t need finished art for the full book — but include 2-3 fully rendered illustrations to show your final art style. Pick your strongest compositions.
For writers submitting text only: You typically won’t submit a physical dummy. Instead, submit a standard picture book manuscript with page-break notations. But having made a dummy means your manuscript already has strong pacing built in.
Digital dummy format. Many submissions now accept PDF dummies. Create yours at the standard trim size (typically 8” x 10” or 10” x 8” for picture books) with each spread as a two-page layout. Export as a single PDF under 10MB.
What to include in a submission dummy:
- Front cover with title and your name
- Full 32-page layout with text and sketches
- 2-3 finished illustration samples (author-illustrators only)
- Back cover
Common Mistakes to Avoid
- Ignoring the 32-page structure. Writing a story that doesn’t fit standard page counts makes publishers immediately skeptical. Know the format before you write.
- Too much text per spread. If you have more than 3 sentences on a spread, cut. Picture books are about economy.
- Illustrations that repeat the text. Text says “the cat sat on the mat” and the illustration shows a cat on a mat. Let text and art do different jobs.
- No variety in visual composition. Every spread looks the same — same framing, same character placement, same layout. Mix it up.
- Forgetting the gutter. Critical text or visual details placed in the center fold where they’ll be lost in binding.
Can You Make a Picture Book Dummy Digitally?
Yes, you can make a picture book dummy digitally using tools like Procreate, Adobe InDesign, Photoshop, or even Canva and Google Slides. Digital dummies let you resize, rearrange, and experiment with layouts faster than paper.
However, most experienced picture book creators — including SCBWI mentors — recommend starting with a physical dummy at least once. Holding the book in your hands teaches you things about pacing and page turns that screens can’t replicate.
If you’re writing the text and need AI help drafting or refining your story, tools like Chapter can help you get your manuscript to the right word count and structure before you start the dummy stage.
How Long Does It Take to Make a Picture Book Dummy?
A rough picture book dummy takes 2-4 hours to make if you already have a finished manuscript. The physical construction takes 10 minutes. The real time goes into pacing your story across spreads, sketching thumbnails, and revising page turns.
Most author-illustrators go through 3-5 dummy revisions before they’re satisfied. A polished submission-ready dummy with refined sketches can take 1-3 weeks, depending on your illustration speed and how many full-color samples you include.
How Many Words Should Be on Each Page of a Picture Book Dummy?
Each spread of a picture book dummy should contain 1-3 sentences, or roughly 15-40 words. Some spreads may have no text at all — wordless spreads are powerful storytelling tools that let illustrations carry the narrative.
The total word count for your entire picture book should stay under 500 words for fiction and under 1,000 words for nonfiction. If you find yourself cramming text onto spreads, your manuscript needs cutting, not smaller font.
FAQ
What is a picture book dummy?
A picture book dummy is a rough, physical mock-up of a picture book that shows how the story, text, and illustrations flow across all 32 pages. Authors and illustrators use dummies to test pacing, page turns, and text-to-art balance before creating finished artwork or submitting to publishers.
How many pages should a picture book dummy have?
A picture book dummy should have 32 pages, which is the industry standard for children’s picture books. Books are printed in multiples of 8 pages (called signatures), so your options are 24, 32, 40, or 48 — but 32 pages is what agents and editors expect unless you have a specific reason to go longer.
Do you need to be an illustrator to make a picture book dummy?
No, you do not need to be an illustrator to make a picture book dummy. Writers can use stick figures, simple shapes, or written descriptions to indicate what happens visually on each spread. The purpose of a dummy is to test story pacing and page turns, not to showcase finished art.
What is the difference between a picture book dummy and a storyboard?
A picture book dummy is a physical or digital mock-up of the actual book with folded pages you can turn, while a storyboard is a flat layout showing all spreads at once, like a comic strip grid. Dummies let you experience page turns physically. Storyboards give you an overview of the entire visual flow. Most creators use both — storyboard first, then build the dummy.
What should you include when submitting a picture book dummy to a publisher?
When submitting a picture book dummy, include a front cover with title and your name, the full 32-page layout with text placement and sketches, and 2-3 fully finished illustration samples that show your final art style. Submit as a single PDF under 10MB at standard picture book trim size (8” x 10” or 10” x 8”).