You can write and publish a professional photography book — even without a gallery showing or a traditional publisher. The key is treating your photography book like a real book, not just an album of pretty images.
In this guide, you’ll learn:
- How to develop a concept that makes your photography book worth reading
- The step-by-step process for curating, sequencing, and writing around your images
- Which layout and design choices turn a photo collection into a real book
- How to self-publish your photography book and get it into readers’ hands
Here is the complete process from first concept to finished book.
What Is a Photography Book?
A photography book is a published book where photographs are the primary content, supported by written text that provides context, narrative, or artistic commentary. Unlike a personal photo book or family album, a photography book has a defined theme, intentional sequencing, and a narrative arc that gives the images meaning beyond their visual appeal.
Photography books fall into several categories:
- Fine art photography books — Showcase a photographer’s artistic vision around a theme
- Documentary photography books — Tell a story about a place, community, or event
- Portfolio books — Present a photographer’s best work for professional purposes
- Essay-based photography books — Pair long-form writing with images to explore a topic
- Coffee table books — Large-format display books designed to be browsed and admired
The global photobook market reached over $3.5 billion in 2025 and continues growing at roughly 5.6% annually. More photographers than ever are self-publishing, and the tools to produce a professional-quality book have never been more accessible.
Step 1: Define Your Concept and Theme
Every great photography book starts with a concept that goes deeper than “here are my best photos.” Your concept is the organizing idea that determines which images make the cut, what text you write, and how the book feels as a whole.
Use the 5Ws Framework
A proven approach from documentary photography is the 5Ws framework: Who, What, When, Where, and Why. Answer these five questions about your project before you select a single image.
For example, if you are creating a book about street photography in Tokyo:
- Who — The people and communities you photographed
- What — Daily life, street culture, and urban rhythm
- When — The specific time period (and why it matters)
- Where — The neighborhoods and locations
- Why — What drew you to this subject and what you want the reader to feel
This framework prevents the most common photography book mistake: trying to include everything instead of telling one clear story.
Choose Between Narrative and Thematic Structure
Your concept determines which structure works best:
| Structure | Best For | Example |
|---|---|---|
| Chronological narrative | Travel, events, documentary projects | A year spent photographing a disappearing glacier |
| Thematic grouping | Portfolio, fine art, multi-subject work | Sections organized by emotion: solitude, connection, wonder |
| Essay format | Photo-journalism, social documentary | Long-form text chapters with supporting photographs |
| Sequential visual | Abstract, experimental, fine art | Images arranged purely by visual flow and contrast |
Most first-time photography book authors do best with either chronological or thematic structure. Both give you a natural way to organize your work and write supporting text.
Step 2: Curate and Select Your Photographs
Curation is where most photography books succeed or fail. You probably have hundreds or thousands of images. Your book needs 60 to 120.
The Ruthless Editing Process
Professional photobook editors follow a three-round selection process:
- First pass — Pull every image that could work. Be generous. You might start with 300 to 500 images.
- Second pass — Cut to your top 150. Remove images that are technically weak, emotionally flat, or redundant.
- Final pass — Narrow to your publishing count (typically 60-120 images). Every remaining photo must justify its place in the story.
The hardest part is cutting images you love. As photobook publishing professionals advise: just because you love an image does not mean it works in the book. You were there and know what it felt like — but the reader was not, and an image needs to communicate on its own.
Get a Second Opinion
Ask a trusted colleague, editor, or fellow photographer to review your selections. Fresh eyes catch redundancy you cannot see yourself. They will notice when three images make the same point, or when an image you are emotionally attached to does not serve the book’s concept.
This is also a good moment to consider working with an AI writing tool to help you draft and refine the written portions of your book while you focus on the visual editing.
Step 3: Sequence Your Images
Sequencing transforms a collection of good photographs into a book that flows. The order of your images creates rhythm, pacing, and emotional impact — just like the chapters of a written book.
Sequencing Principles
Open strong. Your first image sets the tone for the entire book. Choose an image that immediately communicates your theme and pulls the viewer in.
Create visual rhythm. Alternate between wide establishing shots and intimate close-ups. Follow a high-energy image with something quieter. This variation keeps the reader engaged as they turn pages.
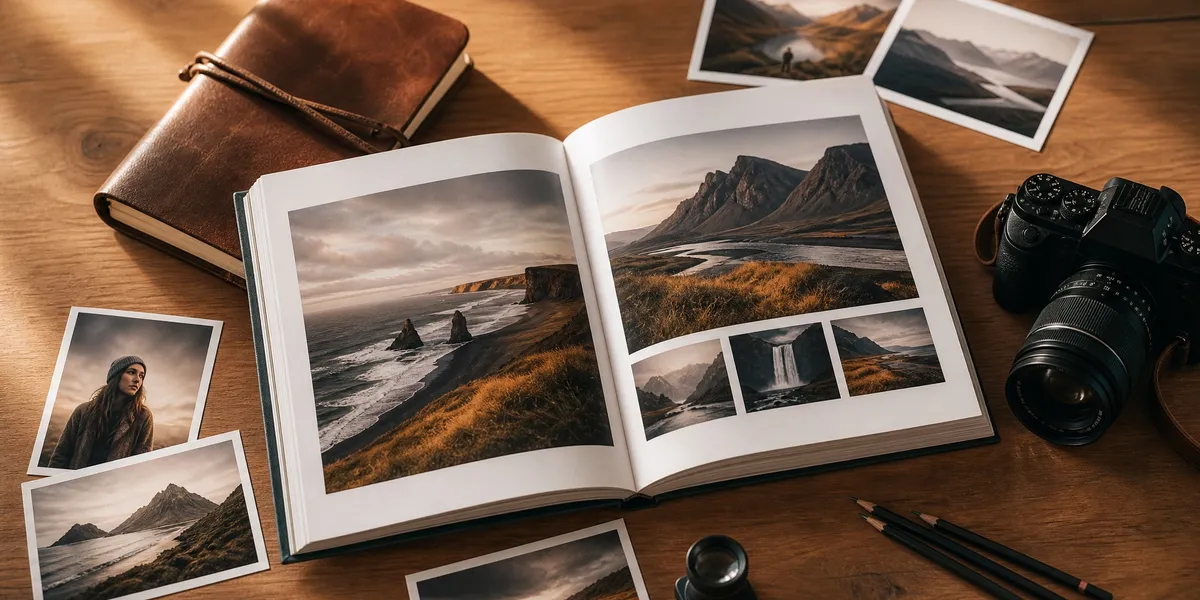
Use pairings intentionally. In a photography book, readers see two pages at once (a spread). The images on facing pages should have a relationship — complementary colors, contrasting subjects, or a visual dialogue.
Build toward a climax. Like any good narrative, your image sequence should build emotional intensity toward a peak, then resolve. The final image should feel like a conclusion, not just the last photo you had left.
The Print-and-Arrange Method
Many professional photobook makers use a physical method that no digital tool fully replaces:
- Print your selected images as 4x6 prints
- Lay them out on a large table or floor
- Arrange and rearrange until the visual flow feels right
- Number the backs once you find the right sequence
This physical process helps you see relationships between images that are invisible on a screen. You can also use tools like book outline templates adapted for visual projects to plan your sequence digitally.
Step 4: Write the Text for Your Photography Book
The text in a photography book serves the images — it does not compete with them. But the right words transform a collection of photographs into something with lasting meaning.
Types of Text in Photography Books
Introduction or foreword — Set the stage for your project. Explain what the reader is about to experience, why you made this work, and what it means to you. Keep this to 500 to 1,500 words.
Section introductions — If your book is divided into chapters or thematic sections, write short introductions (200 to 400 words each) that transition the reader from one group of images to the next.
Captions — Brief text accompanying individual images. Captions can include location, date, technical details, or a sentence of context. Not every image needs a caption — use them where they add information the image alone cannot convey.
Extended essays — Some photography books include longer written pieces that explore the subject in depth. These work best for documentary and journalistic projects where context is essential to understanding the images.
Back matter — Technical notes, acknowledgments, an artist’s statement, and image index. Serious photography books almost always include technical information about equipment and settings.
Writing Tips for Photographers
Most photographers are not trained writers, and that is fine. Your text does not need to be literary — it needs to be honest and clear.
- Write like you talk. Read your text aloud. If it sounds stiff, simplify it.
- Show vulnerability. Explain why this project matters to you personally. Readers connect with genuine motivation.
- Keep it short. When in doubt, cut. A photography book with too much text feels like the writer does not trust the images.
- Avoid describing what the viewer can already see. Do not write “this image shows a sunset over the ocean” beneath a photo that clearly shows a sunset over the ocean. Instead, share what was happening beyond the frame.
If writing feels overwhelming, consider using AI writing tools for nonfiction to help draft your introductions and captions, then edit them in your own voice.
Step 5: Design Your Layout
Layout design is where your photography book becomes a physical object. The choices you make about page size, margins, image placement, and white space define how your work is experienced.
Choosing Your Trim Size
Photography books typically use larger formats than text-heavy books. Common sizes include:
| Format | Dimensions | Best For |
|---|---|---|
| Square | 10x10 or 12x12 inches | Fine art, Instagram-style, versatile |
| Landscape | 11x8.5 or 13x11 inches | Panoramic images, travel, nature |
| Portrait | 8.5x11 or 10x13 inches | Portraits, fashion, vertical compositions |
| Large coffee table | 12x12 or 14x11 inches | Display books, gallery quality |
For detailed guidance on choosing the right book trim size, check our complete size guide. If you are making a coffee table book layout, larger formats give your images the space they deserve.
Layout Design Principles
Give images room to breathe. The most common amateur mistake is cramming too many images onto a page. Professional photography books frequently use full-bleed single images on a spread, or pair one large image with generous white space.
Be consistent with margins and spacing. Pick a grid system and stick with it. Inconsistent margins make a book look unpolished.
Vary your presentation. Mix full-bleed spreads with smaller images surrounded by white space. Include the occasional page with only text. This variation creates visual rhythm and prevents fatigue.
Match layout to content. A documentary project might use tighter crops and grittier layouts. A fine art book might use expansive white space and formal presentation. Let your concept guide the design.
Paper and Print Quality
Your paper choice affects how your images look and feel:
- Matte paper — No glare, deep blacks, ideal for black-and-white and fine art photography
- Glossy paper — Maximum color vibrancy, best for travel and high-saturation images
- Satin or silk paper — A middle ground with subtle sheen and good color reproduction
Choose a paper weight of at least 150 GSM for a quality feel. Heavier papers (200+ GSM) prevent bleed-through and feel premium in the hand. If you are printing a hardcover book, the paper choice becomes even more important because readers expect a premium experience.
Step 6: Publish Your Photography Book
You have three main paths to publish a photography book, each with distinct trade-offs.
Self-Publishing (Most Common for Photographers)
Self-publishing gives you full control over design, pricing, and distribution. This is how the majority of photography books are published today.
Print-on-demand services:
- Blurb — The industry standard for photography books with excellent print quality and multiple format options
- Amazon KDP — Reaches the largest marketplace but offers limited format options for image-heavy books
- Mixbook — Strong templates and design tools for less design-experienced photographers
Offset printing: For runs of 500+ copies, offset printing gives you superior quality at a lower per-unit cost. This is the choice for photographers with an existing audience or gallery representation.
Our Pick — Chapter
If you are writing the text portions of your photography book — introductions, captions, essays, and artist statements — Chapter helps you draft and refine your written content with AI assistance. You focus on your images while Chapter helps the words match your vision.
Best for: Writing and structuring the text content of your photography book Pricing: $97 one-time (nonfiction) Why we built it: Many photographers struggle with the writing side of bookmaking — Chapter bridges that gap.
For a detailed breakdown of publishing costs, see our guide on how much it costs to self-publish a book.
Traditional Publishing
Getting a traditional publisher for a photography book is competitive but possible. Photography publishers like Aperture, Steidl, MACK, and Radius Books actively acquire projects, but they expect:
- A complete or near-complete body of work
- A strong concept and artist statement
- Evidence of exhibitions, press coverage, or awards
- A book proposal that demonstrates market potential
Traditional publishing covers production costs and provides distribution, but you give up creative control and a significant share of royalties.
Hybrid and Partnership Publishing
Some publishers offer co-publishing arrangements where you share costs and creative control. This middle path works well for photographers who want professional distribution but cannot secure a traditional deal.
Step 7: Market and Sell Your Photography Book
A finished book without a marketing plan sits in boxes. Photography books require specific marketing strategies because they are visual products that people need to see before they buy.
Build Anticipation Before Launch
- Share behind-the-scenes content of the bookmaking process on social media
- Post sample spreads and detail shots that showcase the print quality
- Collect email addresses from interested buyers before the book is available
- Consider a crowdfunding campaign on Kickstarter or Indiegogo — photography books do exceptionally well on these platforms
Sales Channels
- Your own website — Highest margins, direct customer relationship
- Amazon and online retailers — Largest reach, lower margins
- Gallery and museum bookshops — Perfect audience, prestige placement
- Photography exhibitions and festivals — Direct sales to engaged buyers
- Local bookstores — Consignment arrangements work well for local photographers
For an in-depth approach to selling, check our guide on how to make a photo book to sell.
Pricing Your Photography Book
Photography books command higher prices than text-only books because of production costs and perceived value. Typical price ranges:
- Softcover photography book — $25 to $45
- Hardcover photography book — $40 to $75
- Large-format coffee table book — $50 to $150
- Limited edition / signed — $75 to $300+
Price based on your production cost, target audience, and where you sell. A book sold through your website at $60 earns you more than a $75 book sold through Amazon after their cut.
Common Mistakes to Avoid
- Including too many images. Sixty powerful images create a stronger book than 200 mediocre ones. Edit ruthlessly.
- Neglecting the text. Even a primarily visual book needs well-written introductions, captions, and an artist’s statement. The text is what separates a book from an album.
- Choosing the wrong format. A landscape photographer forcing images into a small portrait format will frustrate viewers. Match your book format to your photography style.
- Skipping the test print. Always order a proof copy before committing to a full print run. Colors, contrast, and layout look different on paper than on screen.
- No marketing plan. Photography books are niche products. Without targeted marketing to your specific audience, even a beautiful book will not sell.
How Long Does It Take to Write a Photography Book?
A photography book typically takes three to twelve months from concept to publication. The timeline depends on how much of the photography is already complete and how much writing your book requires.
If your images already exist, expect to spend one to two months on curation and sequencing, one to two months on writing and layout design, and another month on proofing and production. Books with significant written content — like documentary projects with extended essays — take longer on the writing side.
Using AI writing assistants can compress the writing phase significantly, especially for captions, section introductions, and back matter that follow predictable patterns.
How Much Does a Photography Book Cost to Produce?
Production costs for a photography book vary widely based on format, page count, and print method:
| Component | DIY / Print-on-Demand | Professional / Offset |
|---|---|---|
| Design and layout | $0 (self-designed) to $2,000 | $3,000 to $8,000 |
| Editing and writing | $0 to $500 (AI-assisted) | $1,000 to $3,000 |
| Printing (per copy) | $15 to $40 | $8 to $20 (500+ copies) |
| ISBN and registration | $0 to $125 | Often included |
| Total for first 100 copies | $1,500 to $6,000 | $7,000 to $15,000+ |
Print-on-demand eliminates upfront printing costs entirely — you pay per copy as orders come in. This is the lowest-risk path for first-time photography book authors.
For a complete breakdown, read our guide on the cost to self-publish a book.
What Software Do You Need to Design a Photography Book?
You do not need expensive professional software to design a quality photography book. Your options range from free to professional:
- Blurb BookWright (free) — Purpose-built for photobooks with templates and direct-to-print integration
- Adobe InDesign ($23/month) — Industry standard for professional book design and complex layouts
- Canva (free/$13 month) — Beginner-friendly with photo book templates, good for simpler projects
- Affinity Publisher ($70 one-time) — Professional-grade alternative to InDesign without the subscription
For the writing portions of your book, Chapter helps you draft introductions, essays, captions, and back matter with AI assistance, so you can focus your energy on the visual design.
If you need help with book cover design or formatting your book for print, we have dedicated guides for those steps too.
FAQ
How do you write a photography book with no publishing experience?
You write a photography book with no publishing experience by starting with a clear concept, curating 60-120 strong images, writing supporting text, and using a print-on-demand service like Blurb or Amazon KDP. Self-publishing platforms handle printing and distribution, so you focus on creating the content rather than managing logistics.
How many photos should a photography book have?
A photography book should have 60 to 120 photographs, depending on format and page count. A standard 80-page hardcover book typically holds 60-80 images with generous spacing. Including too many images dilutes their impact — professional photobook editors consistently recommend fewer, stronger images over volume.
Can you make money selling a photography book?
You can make money selling a photography book, but most photography books are passion projects rather than profit centers. Self-published photographers typically earn $10 to $30 per copy sold. The real value often comes from credibility, portfolio enhancement, and client acquisition rather than direct book sales revenue.
What is the difference between a photo book and a photography book?
A photo book is a printed collection of personal photographs — like a family album or vacation book — created through services like Shutterfly or Mixbook. A photography book is a published work with artistic or editorial intent, featuring curated images, supporting text, and professional design. Photography books are sold commercially and treated as creative or intellectual works.
How do you write captions for a photography book?
You write captions for a photography book by sharing context the image alone cannot convey — the story behind the shot, the location, the date, or the significance of the moment. Avoid describing what the viewer can already see. Strong captions add a layer of meaning that deepens the reader’s connection to each photograph.